Dec 28, 2011

Fast-Food Style Chicken Strips

Fast Food Style Chicken Strips

What you need:


6 boneless, skinless chicken breasts- cut into strips
1 cup of buttermilk*
1 egg
6 teaspoons of garlic powder - divided
2 teaspoons of salt - divided
2 teaspoons of black pepper - divided
2 tablespoons of creole seasoning
2 cups of flour
2 cups of plain bread crumbs
1 quart of oil for frying

*If you don't have any buttermilk, you can make your own by adding 1 tablespoon of white vinegar or lemon juice to 1 cup of milk & letting it sit for about 10 minutes.

What you do:

In a bowl, beat together buttermilk, egg, 3 teaspoons of garlic powder, 1 teaspoon of black pepper & 1 teaspoon of salt.

Place your cut up strips of chicken in a gallon size Ziploc bag & add in the buttermilk mixture.

Refrigerate for 2-4hrs.

In a large bowl, stir together flour, bread crumbs, remaining 3 teaspoons of garlic powder, remaining 1 teaspoon of black pepper & creole seasoning.

Drain chicken from buttermilk mixture- but make sure to put the buttermilk mixture from the bag into another bowl- you will need it for second coating.

Dredge all the strips of chicken in the flour/breadcrumb mixture. Then, re-dip each strip in the buttermilk mixture & dredge in the flour/breadcrumb mixture a second time.


Heat your oil to 375 degrees F (I don't have a thermometer, so I just test it by tossing in a tiny piece of chicken & waiting for it to start to fry- then I know it's ready).

Fry until a nice, golden brown (you may want to check the temp or cut one in half to make sure they're done). Place on a pan lined with paper towels to drain excess oil.


These are absolutely delicious dipped in ranch dressing & served with french fries, mashed potatoes, or cheesy veggies.

I was SO happy with how these turned out. Honestly, I've never fried anything before. But it was way simple & these really taste just like something you'd order at any fast food joint. Except my boyfriend said these were better. ;) Even my super picky kids gobbled them up. & That's the true test, ha!

Dec 22, 2011

Oreo Balls

Let's be honest here for a second. There are few things in this world that are better than Oreos, cream cheese & chocolate. It's only natural to marry the three. I don't like to toot my own horn (toot toot!)... but these are one of my most requested & most beloved treats that I make.

They are incredibly rich, decadent & sinful.

I will warn you in advance- these are time consuming. They are difficult to make- but it does take some time. I spent literally over 12 hours straight making a huge batch the other day. & Another 5 hours today.

CLEAR YOUR SCHEDULE, FOLKS.

It's time to get ballsy.

Oreo Balls

What you need:

1 package of Oreos (any kind- I use regular Oreos, peanut butter, mint & a new kind called berry blast. Don't get double stuff!)
1 package of cream cheese (8oz)
Almond bark (I use both vanilla & chocolate)
Sprinkles


What you do:

Using a food processor or blender, crush the Oreos into fine crumbs (I do not suggest doing this by hand- which is what I have to do since I have neither of the aforementioned appliances. But if you do have to crush them by hand, put them in a gallon size Ziplock bag & use a rolling pin to roll, beat & smash them to as fine of a consistency as humanly possible). Transfer to a large bowl & add in cream cheese. Mix by hand (don't be afraid to get messy! This is the best way to mix evenly). 

Form into 1in balls & place on a baking sheet lined with wax or parchment paper & place in the freezer for up to one hour.

Melt almond bark (I do one variation at a time, dipping half the balls in chocolate almond bark first, then melting the vanilla & dipping the other half) & use toothpicks to submerge the balls. Hold over the bowl, gently shaking off all the excess almond bark. Replace onto baking sheet & remove toothpick (dab a little bit of almond bark over the hole made by the toothpick).

Once the almond bark is hardened (it doesn't take long) you can decorate them. I use sprinkles & corresponding colored almond bark to decorate mine (just cut a tiny corner off of a Ziplock bag & pour in a little bit of almond bark & drizzle over the balls).

Store in the refrigerator (& don't let your kids see you sneaking them.. They'll be upset with you).

Dec 16, 2011

Cake Batter Pudding Cookies

Okay.

If there is one thing I love- it is eating cookie dough & cake batter. Unhealthy? Yes. Do I care? No.

When I found this recipe on Pinterest, I almost peed myself with excitement.

A cookie that is CALLED "Cake Batter Pudding Cookies."

I had to try it out. Gabe & Evelyn helped, of course.


What you need:

1 1/2 sticks of butter (that's 3/4 cup)
3/4 cup of brown sugar
1/4 cup of sugar
1 package (3.4oz) of instant vanilla pudding mix
3/4 yellow cake mix
2 eggs
1 teaspoon of vanilla extract
1 teaspoon of baking soda
2 1/4 cups of flour
1/2 teaspoon of salt
SPRINKLES!

What you do:

Preheat oven to 350 F.

In a small bowl, stir together flour, salt & baking soda.

In a large bowl, cream butter & sugar together.

Add in pudding package & cake mix. Beat until well blended.

Add in eggs & vanilla. Beat until smooth.

Add flour mixture gradually until batter is mixed well.

Mix in your sprinkles. Use whatever kind(s) you want & however many you want!

Bake for 10-12 minutes.

** As I have mentioned before, my oven seems to run on the hot side- but I only needed to bake these for 7 or 8 minutes at 325 degrees! Any longer & the bottoms burned! **

& In case you wondering, they really do taste just like funfetti cake batter! ENJOY!

Credit is owed to the Chef In Training blog for the original recipe. <3

Dec 15, 2011

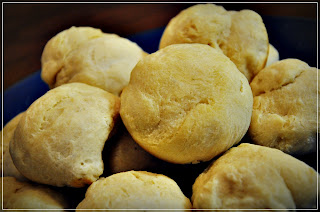
Easy Potato Soup & Made From Scratch Biscuits

Can anybody tell me why it is the middle of December & it's almost 60 degrees after midnight.. in Iowa? I'm pretty sure the world is ending & we're all gonna die.

So it's pretty important that you make this soup like, right now. You should've actually done it yesterday. What you doing with your life?!

I first had this soup when I was around 13, I believe. My Aunt made it for Christmas Eve dinner every year until just a few years ago. I became slightly enamored with this soup. It made me feel all warm & fuzzy inside. I started making it on my own about 6 years ago. I've never gotten it to taste the same as my Aunt's did- but this remains my absolutely favorite comfort food for a cold or rainy day.


Easy Potato Soup
& Made from scratch biscuits

What you need:

-3lb bag of baby red potatoes
-1/2 of a large, white onion, diced
-3 celery stalks, cut up (I actually only use 2)
-4 slices of bacon, cut up (again, I only use 2)
-1 cup of sliced baby carrots
-1 tablespoon chicken bouillon
-4 cups milk
-4 cups water
-1 cup half & half
-1/2 cup of margarine (1 stick) plus 3 tablespoons
-1/2 cup of flour
-Salt, to taste
-Shredded, cheddar cheese

What you do:

Wash potatoes- don't peel them- & then dice up into good bite-size chunks. Place in a large pot of water & boil until tender. Drain & put back into pot.

In a large skillet, melt the 3 tablespoons of margarine & saute onion, celery, bacon & carrots until tender. Add to pot of potatoes.

Pour in milk, water, half & half & add chicken bouillon & about 2 teaspoons of salt. Stir.

Turn heat on medium.

While the soup heats up, you're going to make a roux.

In a small sauce pan, melt 1/2 cup of margarine. Add 1/2 cup of flour & stir continuously for about 30-45 seconds. Add to soup & mix with a wire whisk.

Continue to let soup heat up until it bubbles- but do not let boil!

Serve with crackers or biscuits (for which I shall provide a 'from scratch' recipe below). I tend to be a bit of a salt & cheese fiend.. I add a lot of them to my bowl of soup. This soup isn't incredibly thick- but it will thicken in the fridge if you have leftovers.

& Now onto the biscuits!

Made From Scratch Biscuits

What you need:

-2 cups of all purpose flour
-1 tablespoon baking powder
-1/2 teaspoon of salt
-2 tablespoons of sugar
-1/4 cup of butter or margarine
-3/4 cup of milk

What you do:


Mix together all dry ingredients & then "cut in" butter. Mix until the mixture looks like coarse bread crumbs. Stir in milk until it blends together to form a dough ball.

Place your dough ball on a heavily floured surface & let it set for about 5 minutes. Then knead the dough for 1-2 minutes. Re-flour your surface & roll dough out to about 1/2in thickness & cut with a biscuit cutter or a glass (honestly, I'm lazy & I just rip chunks of dough off the dough ball & flatten with my hands & then place into the bottom of greased muffin tins- so much easier & they turn out just fine).

Bake at 325 degrees F for about 12 minutes or until edges are slightly brown.

If you want to do a little extra, you can melt some margarine & add a little garlic powder & then brush that mixture onto the top of biscuits before you bake them.

You can also double this recipe- which makes a LOT of dough. But it freezes really well & doesn't actually take that long to thaw out.

Serve 'em hot, slathered in margarine. Nom nom, nomity nom.

Dec 14, 2011

Ultimate Chocolate Chip Cookies

 Son of a nutcracker. What a long week it's been. I apologize for my lack of posts (especially so soon after starting up this blog). All three of my kids have been sick. As we speak, a poor 4yr old boy is nestled up on my side suffering from a ruptured eardrum. 

So what does a girl time in this time of crisis? Bake cookies, of course. 

I found this recipe online & altered it to my liking. They are wooonderful. But you have to be careful to not over-bake them. If baked just right, they are slightly crispy on the outside & chewy n' gooey on the inside. My son, in his fragile state, has refused to eat any. So I ate his share. & Then some. ;)

Ultimate Chocolate Chip Cookies

What you need:


1 cup of butter (softened)
1 cup of white sugar
1 cup of brown sugar (packed)
2 eggs
2 teaspoons of vanilla extract
3 cups of all-purpose flour
1 teaspoon of baking soda
1/2 teaspoon of salt
1 1/2 cups of semi sweet chocolate chips
1 cup of white chocolate chips

What you do:

Preheat oven to 325 degrees F.

In a medium to large bowl, cream together the butter, white sugar & brown sugar. Beat in the eggs one at a time & mix in the vanilla.

Slowly add in flour, baking soda & salt.

Stir in chocolate chips & drop by spoonfuls onto ungreased baking sheets.

Bake for 8-10 minutes until edges are slightly browned.


Nom. Happy snacking!

Dec 7, 2011

Banana Chocolate Chip Muffins

Oh, what a day, what a day.

My little Lydia is beyond fussy, tonight. She has got to be getting teeth. If she's not, then she's turning into a demon. I'm really hoping for the former. I already have one (arguably two) demon children. Just PLEASE let this one turn out well-behaved! .. Yeah right. Ha!

I wasn't going to bake, today. I really wasn't. I told myself when I got up this morning.

But, boredom got the best of me & then my son begged me for a banana.
(Read out of context, that sentence is hilarious, by the way)

When I realized that the bananas we had were horribly brown & squishy, I told him I could do better than give him a banana. I could give him a banana muffin. Not just a banana muffin, but a banana chocolate chip muffin.. With streusel topping!

They were easy to make & my kids thought it was absolutely hilarious that I mashing up bananas. They just couldn't understand the concept & they thought I was insane. Although, I probably did seem just a little bit unbalanced as I was mashing up bananas with a fork & singing, "Asanta sana, squash banana!"
 

Banana Chocolate Chip Muffins
with a crunchy streusel topping

What you need:

-1 1/2 cups of flour
-2/3 cup of sugar
-1/2 of a packet of instant vanilla pudding mix
-1 1/2tsp baking powder
-1/2tsp baking soda
-1/4tsp salt
-1 cup of mashed bananas (I used 3 smaller sized ones)
-1 egg
-1/2 cup (1 stick) of butter or margarine; melted
-1/2 cup of milk
-1/4tsp of vanilla extract
-1 cup of semi-sweet chocolate chips

What you do:

Preheat oven to 350 degrees.

In a large bowl, mix flour, sugar, pudding mix, baking powder, baking soda & salt together. In a smaller bowl, whisk together egg, melted butter, milk, mashed bananas & vanilla extract. Add to you dry ingredients & mix by hand with a wooden spoon or whisk. You don't want to over beat the batter. Stir in chocolate chips.

Pour batter into muffin tin of your choice (I did a dozen normal sized muffins & a dozen mini muffins) 3/4 full. Top with streusel topping (see recipe below).

Bake for 20-25 minutes or until toothpick inserted in the center comes out clean.

My mini-muffins were done in 10 minutes. My regular size muffins were done in about 22 minutes.

Crunchy Streusel Topping

What you need:

-1/2 cup of oatmeal
-2/3 cup of flour
-2/3 cup of brown sugar
-1/2tsp of cinnamon
-1/3 cup of walnuts of pecans; finely chopped (I used pecans)
-1/2 cup of melted butter or margarine

What you do:

Mix your dry ingredients & then pour melted butter over top & stir until the consistency resembles coarse crumbs.


The perfect breakfast muffin! They are so good- my 4yr old & 2yr old ate all but 3 of the mini muffins after I made them.

Enjoy!

Dec 6, 2011

Hot Cocoa Cupcakes

Time for a little trip down memory lane.

Every single year- up into my early twenties- once the first snow fell & every day thereafter, I would pop a big ole' bag of popcorn & drink a giant mug of cocoa. I would cozy up in my special corner of the couch with a blanket & stare out the big picture window in the den. It was my happy place.

Cut to the present. I picked up my oldest from preschool shortly after noon (looking fly in my sweatpants). The snow was falling & it was windy & downright bone-chillingly cold out. We got into the house & I longed for a mug of cocoa. But I knew if I tried to sit down & enjoy a moment of peace, all hell would break loose. So instead, I popped in a movie & let the kids cozy up. & I decided, on a whim, to bake something. Cocoa related, of course.

I did a little searching online & found a few ideas to go off of. What follows is all that transpired..


Hot Cocoa Cupcakes
with homemade buttercream icing

 Here's what you need:

- 1 1/2 cups of sugar
- 1 2/3 cups of flour
- 1/2 cup of cocoa powder (I used instant cocoa mix)
- 1/4 teaspoon baking powder
- 1/4 teaspoon baking soda
- 3/4 teaspoon of salt
- 2 eggs
- 3/4 cups of milk
- 1/3 + 1tbsp vegetable oil
- 1/2tbsp vanilla extract
- 3/4 super hot water

Here's what you do:

First, preheat the oven to 350 degrees.

In a large bowl, mix together your sugar, flour, cocoa, baking powder, baking soda & salt.

In a separate, smaller bowl, whisk together egg, milk, oil & vanilla. Add to the dry ingredients & mix on low for 5 minutes (if you have an electric hand mixer & not a stand mixer, you're in for a real treat.. not). Gradually add the hot water & mix until combined. The batter will seem kind of thin, but that's okay.

Pour your batter into coffee mugs & place them on a baking sheet.

I used 4 coffee mugs & had a little batter left over, so I got out my muffin pan & poured the leftover batter into 4 of the "slots" for the kids. I played around with these a bit. I added a few mini-marshmallows & some chocolate chips to the batter. Just to see how they'd turn out.

Bake for 25-30min or until the center feels firm & a toothpick inserted comes out clean! The cupcakes in the muffin tin will take less time than those in the coffee mugs. Roughly around 15-20min.

Set aside & cool completely.

In the meantime, you can make the buttercream icing.

Homemade Buttercream Icing

What you need:

- 4 cups of confectioner's sugar
- 1 cup of margarine (two sticks)
- 1tsp of vanilla extract
- 1/2tsp of salt
- 4-6oz of heavy whipping cream
- 1 cup of whipped topping (optional- I use it because for me, without it, the frosting is way too sweet!)

What you do:


In a medium to large bowl, cream margarine until it's fluffy. Then you add in the sugar one cup at a time until well blended. Add in vanilla, salt & whipping cream. Stir until all ingredients are combined. Then beat on high speed until frosting is fluffy. If you are adding in whipped topping, add it now & fold into frosting.

*This frosting needs to be refrigerated! & It will keep for up to 5 days in the fridge*


After you've licked the beaters.. & the spoon.. & the bowl.. & dipped your finger directly into the icing numerous times & now that you have a massive stomach ache from excessive sugar consumption.. It is time to decorate your cupcakes! Use as much (or little- but c'mon, who are you trying to fool?) as you'd like. Throw on some chocolate sprinkles & a few marshmallows (I put my marshmallows on first & put them under the broiler for like, 3 minutes) & voila! It's like a tall glass of hot cocoa in cake form. Which is, obviously, the best form. & If you want to indulge yourself even more-so, then go ahead & pop a bag of buttered popcorn, sprinkle some cocoa powder over it & add some chocolate sprinkles. Cozy up on your couch & let it snow, let it snow, let it snow.


Dec 5, 2011

Deck the halls with lots'a babies.

My Christmas spirit has been ascending slowly. Does anybody else feel as though not only Christmas, but winter, have just completely snuck up on you & basically yelled, "HO HO HO, BITCH!" ... No? Just me?

I wait all year for this time of year. My best & most cherished childhood memories are from Christmas. I believed in Santa Claus until I was 12 years old (blame my mother! She was an enabler!). Everything about Christmas was magical & wonderful & warm. I want, more than anything, for my children to have the same feelings & to make our own magical memories.

It's hard, but I sometimes need to step back & let them go a little crazy. Let them shout & jump around & be excited. I am a control freak, in every sense of the word. I have little tolerance for chaos & I will humbly admit that I lack any amount of patience. Sometimes, I worry that I am too hard on my kids. Until Evelyn slaps Gabe in the face & he pushes her over a chair.. Then it's on & the mom voice comes out. Ha. ANYWAY. Christmas is the perfect reminder that they're kids. They're going to act a fool every once & a while. I have got to just let go, sometimes.

Getting to the point, we had a lot of fun this afternoon. I got them dressed up & let them play with a strand of lights in front of the tree. Meanwhile, I went stealth mode & snapped some pictures. The result was enough to melt me into a giant puddle all over the floor. The true beauty is that all the pictures were candid. Just my beautiful children being amazed that they were allowed to play with this giant strand of glowing lights.


I cannot wait for Christmas morning with this crazy crew.

Let's Begin!

I have decided, along with the rest of the maternal population in this country, to start a blog.

Why?

For my own amusement (I get bored). For documentation (mommy-brain is a real disease). For my own sanity (sometimes, I want to free all the giraffes from the zoo. Other times, I am certain I live in a zoo). & Mainly because I am a real person- with real problems, with real joys, with real experiences that I can only hope will entertain, inspire, help & depict life as I know it.

Why am I "The Midnight Mom," you ask? Is it because I'm dark? Is it because I'm mysterious? Is it because I'm some type of secretive superhero with a hidden agenda? No.No. & Maybe. But actually, it's because I am a stay at home mom. The midnight hours are the only hours I have to myself to unwind, to sit down, to take a deep breath & ask myself, "What the hell am I doing?!"

So let's get acquainted. If you know me personally, you can probably disregard this part.

My name is Kristina. I am 25 years old (I have a real Peter Pan complex & am in denial of the fact that I am aging). I am tattooed. I am pierced. I live my boyfriend, Jake. I have three biological children & a "stepdaughter" (only in quotations because I am not married. Yet. COUGH COUGH). I fancy myself a photographer.. But realistically, I rarely use my Nikon D90 DSLR for anything but taking pictures of my kids & food, anymore (sadly, I use the camera on my phone more often than my actual camera. I apologize in advance for all the crappy cellphone quality pictures that will be posted). Speaking of food, I bake. & I cook. I do these two things almost daily. You can probably expect recipes & pictures of delicious nomnomnom's that I make.

Let me introduce you to my brood.

This is my bearded boyfriend, Jake.
Blowing bubbles.
Yours truly.


This is Evelyn. She will be two on December 26th.
She is often unpleasant.
Do not let her sweet little face fool you.
This is Gabe. He will be five in March.
I feel as though he is an old soul.
He has a heart of gold & is wise beyond his years.


This is my Cailin. My "stepdaughter."
She will be five in April.
She & Gabe are polar opposites & partners in crime.
This is Lydia. She is 7mos old.
Borderline ginger-baby. Sweet as can be.


& There you have it. My own personal circus.
Welcome to the madness.